Introduction to Triggers and Alarms — an IoT rules engine
In Assetwolf you can define Triggers — possible event conditions that should trigger some action. Then you can define Alarm procedures — what should happen when the condition arises, and when it finishes.
Defining a Trigger
In the Setup area, go to Triggers and click +New Trigger.

You'll see a screen like this:
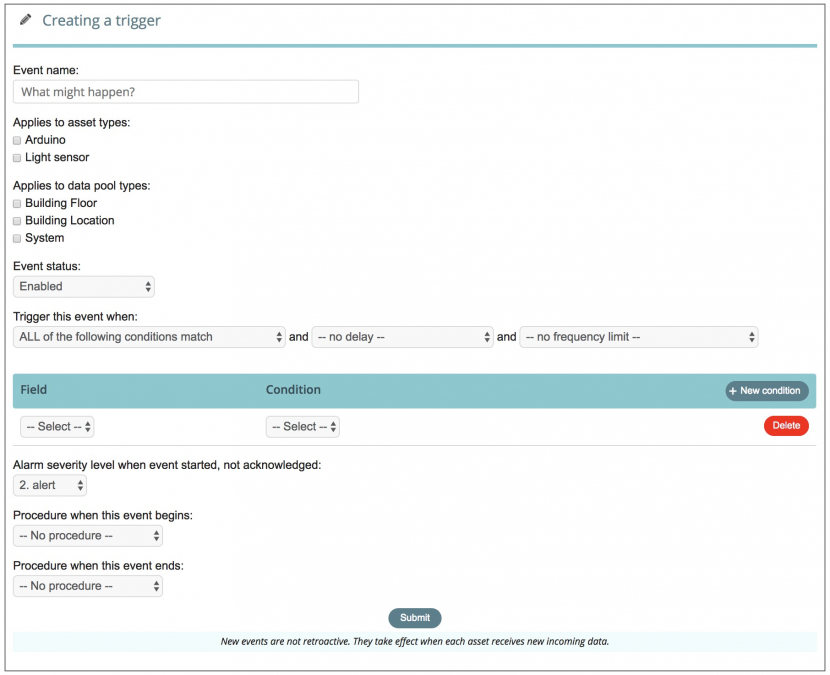
Give the trigger a name to describe what happens. We'll take an example of a light level detector, so you could call it "Gets bright in here".
A trigger can potentially apply to several asset types, so long as they contain the fields you use in the condition. You can even specify a trigger based on a data pool, which means that an event can be raised when an event occurs to a whole group of assets (for example, a maximum light level across all light sensors in a building).
In this example, we'll keep things simple, and make the trigger occur when a single incoming field called lightlevel from a light sensor records a level above 600. (In this section, you can specify numerous conditions if required). We'll also use a delay switch, because our example light sensor is a little noisy and sends data every 90 seconds, so we only want to have the alarm be triggered when the light level is matched for at least 5 minutes.
When conditions are met
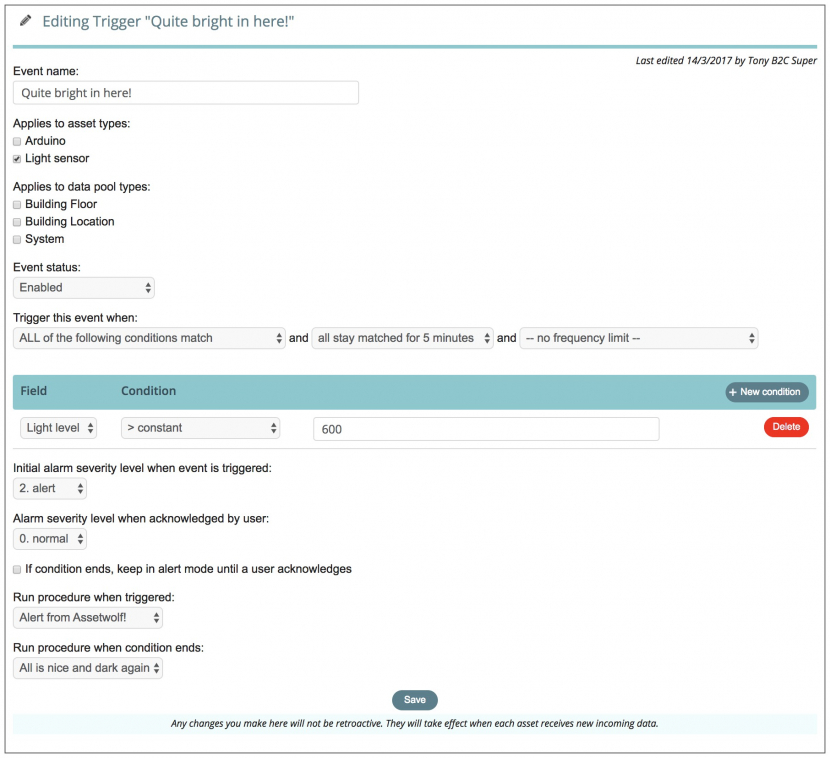
After defining those rules for matching conditions, you can say what happens when the conditions are met.
Assetwolf has the concept of alarm severity levels. Assets normally operate at level 0 (i.e. "OK"), but when an alarm occurs they go to a higher level, such as level 2 in this example, which is an alarm level.
When an event occurs, you may want to have a user acknowledge it. Depending on your situation, you may be happy for the acknowledgement to mean "all's okay again" and the asset's status returns to level 0 (even if the situation still exists). Or you may prefer to keep the alarm severity at a warning level (such as level 1), when someone acknowledges it, and keep it there until the actual condition goes away.
There is a further option in that it may be critical that events are acknowledged, and it is definitely not okay if the condition goes away by itself without acknowledgement. An example of this could be a refrigerator, in which a sensor detects that the temperature has got too high. Even if the temperature goes down again the food inside may have gone bad! So there is a checkbox "keep in alert mode until user acknowledges" to handle this.
After these options, you can determine what procedure to follow when the trigger fires, such as an email to a member of staff. We will cover Procedures more in another documentation topic.
Our trigger now looks like this:
So now let's give it a try!
Viewing events
If you've followed our article on using an Arduino to send data to the cloud, you should be able to try this yourself. The Arduino is connected to a light sensor in this example, and sends a field to the portal called lightlevel. This of course could be a different field, depending on your application.
Here is how the asset appears on the Dashboard:

When clicking through to view the details, we can see more about the asset. Going into the light level graph reveals the light level for the past few hours, like this:
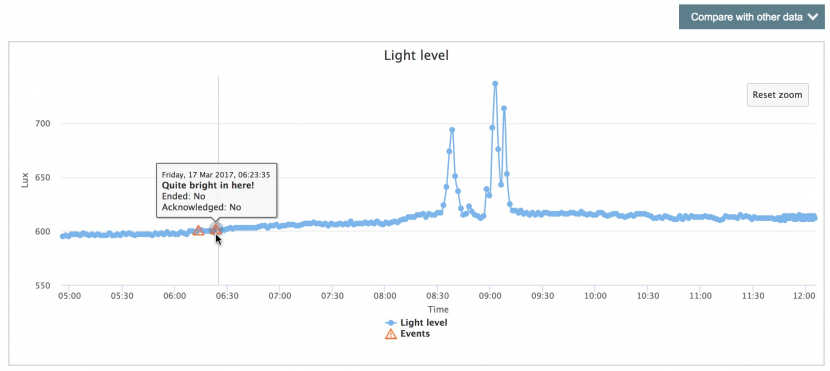
This shows the light level rising (with a bit of fluctuation) shortly after 6am, and on each occasion an event has been triggered.
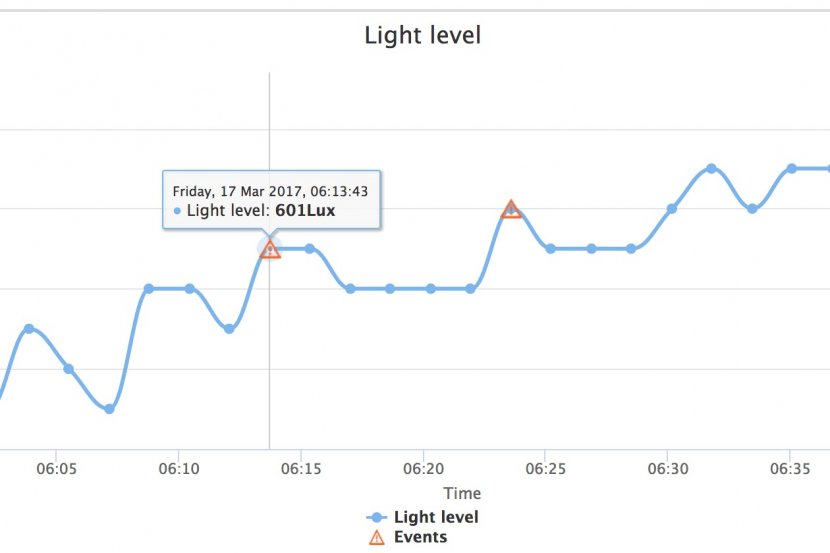
Looking a little closer, we can see the fluctuations:
I hope that's enough to get you started with using Assetwolf as an IoT rules engine, at least in its simplest form. Further articles will show how to build on this with more sophisticated rules and procedures.