How do I make a REST connection to the Assetwolf IoT portal?
Assetwolf supports both simple REST (http GET) and MQTT protocols for receiving data from remote assets. MQTT is best: we recommend this for production situations and where data payloads are complex, and Assetwolf has more features for MQTT. But to get a simple connection going youmay find it easiest to start with http GET requests.
Here's our guide to get you started quickly with GET.
1. Add your first asset
Inside your portal, click "+ New asset" to create a new asset, and you should see a screen like this:
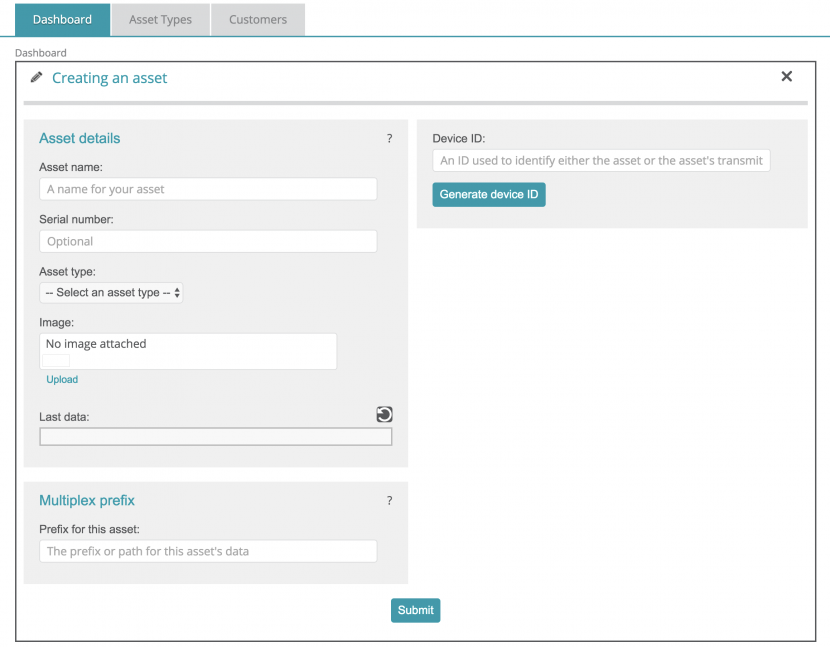
Enter details like this:
- Asset name: a name for your asset
- Device ID: a unique Device ID which identifies your asset with the portal
- Serial number: optional, and this is for display only; only use this if your device has other identifications beside Device ID
- Asset type: this determines which fields an asset will have, how to present graphs and so on
- Image: you can upload an image for this specific asset
- Last data: once your asset has successfully sent some data, the last data received will be shown here (useful for diagnosing problems)
- Multiplex prefix: leave this blank; this is an advanced feature that allows a single communication device to send data for a group of assets (we'll cover this in another guide).
Asset types
You'll need to select an asset type from the drop-down menu; this determines the data fields that will be recorded for that asset. Some asset types are defined for you, but otherwise you can create a new asset type or specify an existing one.
Device IDs
For the Device ID, you can click the "Generate device ID" button to auto-generate an ID for the asset. If you don't like the ID, just type in an ID yourself. You can of course copy the ID from the device if it already has an ID. It doesn't matter which you do, but the important thing is that the Device ID entered on Assetwolf must correspond with the Device ID that the asset uses to identify itself.
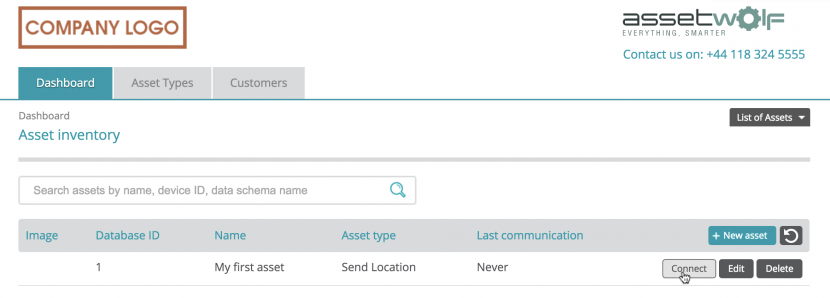
Save your asset
When you save your asset, your list should look like this (in this case using an asset type called SendLocation):
Connect the asset
Click the Connect button as shown above, beside the asset. You should see a screen like this:
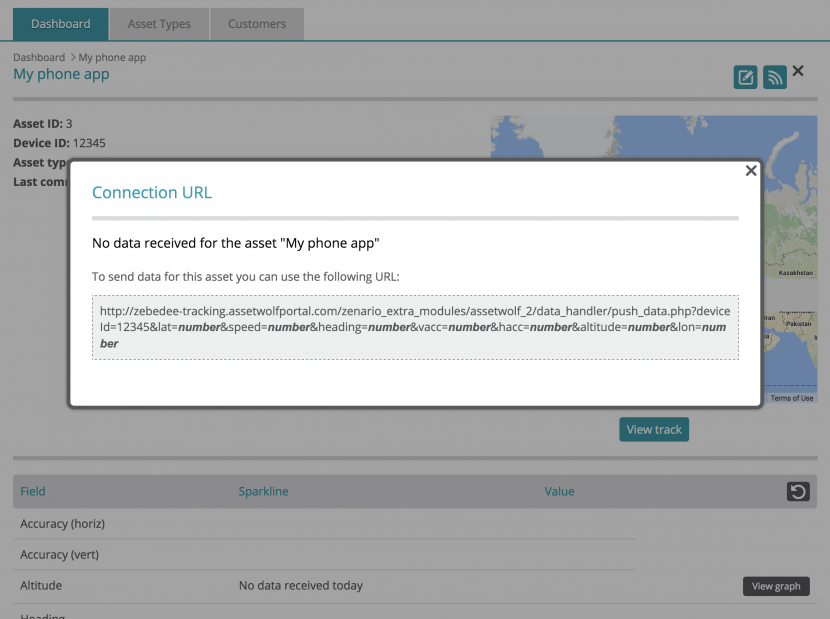
The pop-out window will show you the connection string for your asset. Have a look at the GET request shown there, your asset will need to send that data. It will pre-populate the string with the device ID of the asset, and then show you the fields expected.
If your asset is programmable - many people use Python or C for example - you should make your program output the string as shown, replacing the italicised fields (e.g. number) with real values.
You can send Boolean, with "1" or "0", or "true" or "false".
You can send text strings, but if these contain spaces or special characters they will need to be URL-escaped.

If you see something like the above, your asset is sending data successfully. Graphs and other fields will appear when enough data has been sent through.